I built a lab on my Windows 8 laptop consisting of System Center 2012 Configuration Manager, Operations Manager, Configuration Manager, a DC, SQL, and SharePoint. Although it runs so-so on my 7200RPM hard drive I decided to join the club and finally get an SSD for a secondary drive. After months of research I ended up with the Intel 330 240GB SSD and purchased it on Amazon for about 180$. This blog post addresses two items. First I had problems with my OS locking up when attempting to format my new SSD. And second moving Hyper-V VM’s to a new drive.
Trouble formatting new *Intel* SSD
I had some difficulty formatting the drive in Computer Management. Every time I attempt to format it, it would lock up my OS. So here are the steps I took to resolve it:
!!!! WARNING: this will destroy all data on the target disk !!!!
- Download and install Intel SSD Toolbox
- Open an elevated cmd prompt.
- Type diskpart.exe and hit enter
- list disk
- select disk # (the disk you want to clean)
- clean all (more info on this command and diskpart http://technet.microsoft.com/en-us/library/cc766465%28v=ws.10%29.aspx )
- It will take 10-20 minutes or so but after these steps I was able to format the drive.
Also note that 64K unit allocation size is recommended for drives where VHDX’s will be stored (since they will be large files). This unit size is not recommended for smaller files. You can use the wizard in computer management or run format FS=NTFS LABEL=”L.A.B.” UNIT=64k QUICK in disk part.
Moving your Hyper-V VM’s via PowerShell
After installing my shiny new SSD I sure as heck wasn’t going to move all my VM’s manually, so PowerShell it is!
Here is a good start to become familiar with the Hyper-V PowerShell cmdlets. Just be sure to run the PowerShell ISE is elevated mode! http://social.technet.microsoft.com/wiki/contents/articles/8700.windows-server-8-manage-hyper-v-3-0-with-powershell-en-us.aspx
After you familiarize yourself with some of the cmdlet’s there is some really slick ones for moving VM’s around:
- Move-VM (Moves the VM to another host)
- Move-VMStorage (Moves all of the VM’s dependencies to another location)
I’m moving my VM’s to my new SSD on my laptop so Move-VMStorage was the best route!
- Start with Get-VM to get a list of VM’s
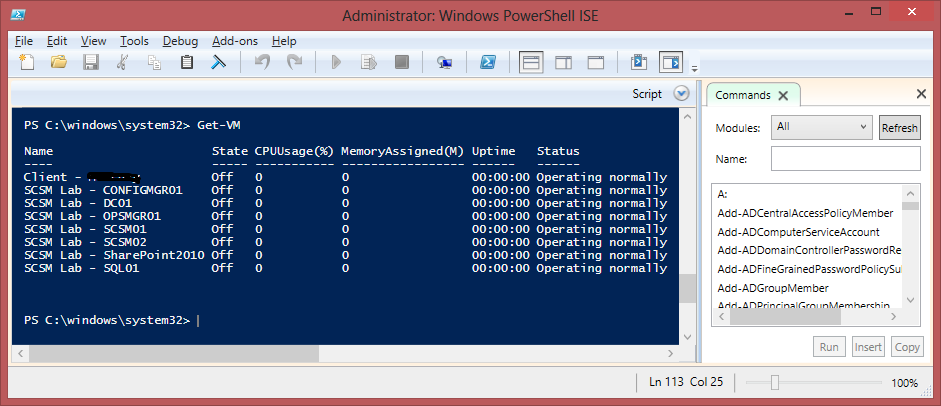
- Now you will want to copy that to a variable. Let’s say $VMs via
1
$VMs = Get-VM
- Now for each of these $VMs we will want to execute Move-VMStorage to (in my case) D:\.
1
2
3
4
5
6
7
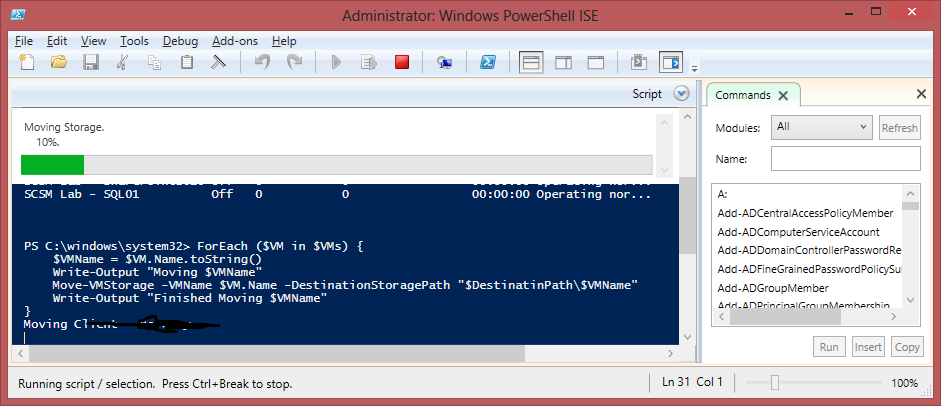
$DestinationPath = "D:\SCSM Lab"
ForEach ($VM in $VMs) {
	$VMName = $VM.Name.toString()
	Write-Output "Moving $VMName"
	Move-VMStorage -VMName $VM.Name -DestinationStoragePath "$DestinationPath\$VMName"
	Write-Output "Finished Moving $VMName"
}
A progress bar will appear indicating the move is occurring:
- That’s pretty much it :). You will also be able to migrate them while they are still running, although it could take longer.
Full script:
1 2 3 4 5 6 7 8 | $VMs = Get-VM $DestinationPath = "D:\SCSM Lab" ForEach ($VM in $VMs) { $VMName = $VM.Name.toString() Write-Output "Moving $VMName" Move-VMStorage -VMName $VM.Name -DestinationStoragePath "$DestinationPath\$VMName" Write-Output "Finished Moving $VMName" } |